Last week I visited Labor Berlin, an independent film laboratory dedicated to experimentation with motion picture film. They do everything film-related, from making their own chemical solutions to filming, processing, and screening, in all kinds of films (8 mm, 16 mm, 35 mm…). It is pretty much a hackerspace, but for film-related stuff.
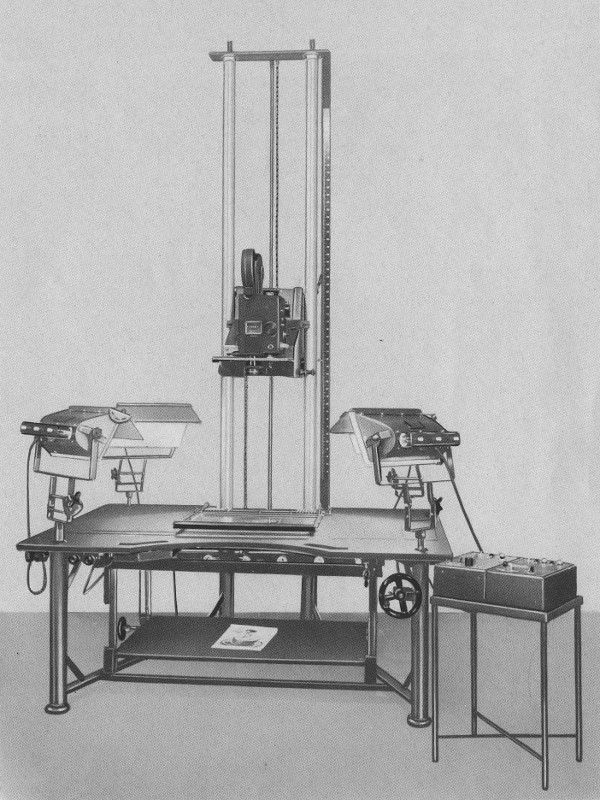
One piece of equipment they had there was a Crass Tricktisch. It’s a film animation table and an animation camera, made by Crass GmbH.

The table and camera were given to Labor Berlin by L’Abominable, an independent French film laboratory just like them.
Basically, you have a table to draw your animation, a camera looking at the table from above, and a controller that lets you take single pictures, move the film forwards, backwards, and do some funky stuff like cross-fade.
They had a couple of cameras to use with the table, one super 16, and another 35 mm. The super 16 camera was connected to the animation table and they had already used it a few times, but the 35 mm camera had never been tested by them, since the connector was different, and wouldn’t attach to the table.
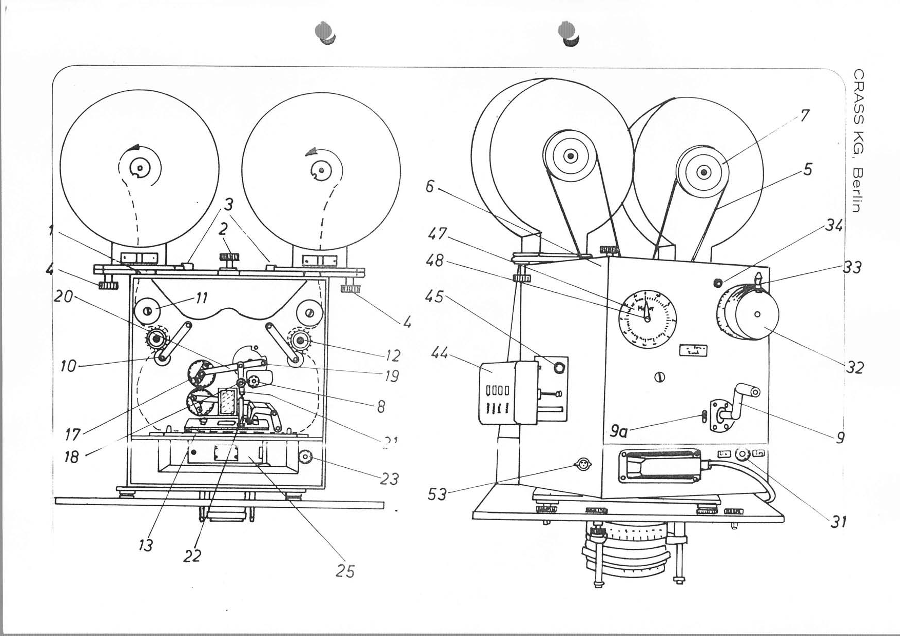
I got curious about how hard it would be to adapt the 35 mm camera to fit the connector, or vice-versa. We searched around in the Internet and found this website with some documentation about the table and the camera. These documents were written in the 60’s, 70’s, and some even in the 90’s. Part of the documents appear to be original technical manuals, others are hand-drawn, and others appear to be previous attempts at reverse-engineering. There was also a more official-looking manual at the laboratory with some nice drawings (like the image of the table above).

The electrical schematics are a bit old-fashioned and they’re written in German, so I thought it would be easier to reverse-engineer the whole thing from the start than to try and understand German =).
I picked up a screwdriver and started opening the camera, taping each screw to a piece of paper with a description of where the screw came from. From my previous reverse-engineering endeavours, I know very well that it is important to document where each extracted part comes from. I don’t have a photographic memory, nor much of a good short term memory, so I usually end up with many pieces left after reassembly.

After opening the first side, I could see the connector and the motor. The schematic had the description for the connector, but in all the manuals there were about 3 or 4 different description for cameras, so I didn’t know which one was correct. I opened up the whole camera, followed all the wires (even some tricky wires that turned out to be just stubs), tested all the pins, and came up with this schematic:

The camera uses one main motor to turn everything. It’s incredible how they managed to do everything mechanically. The same motor takes care of pulling the film, activating the shutter (in 3 different selectable speeds!), activating the film break system (so that the film is stopped while the shutter is open), counting the number of frames, and probably other things that I can’t remember right now.
The shutter uses a sliding window to give different exposure times, and there are two micro-switches directly related to the shutter. One of them changes state when the shutter is about to open, and the other changes state when the shutter is about to close.
The sliding shutter window uses an electrical circuit connected to a mechanical system to give the proper exposure time. There’s a complex mechanical system that automatically changes the exposure time, in order to do fade-ins and fade-outs. I spent quite some time trying to understand all of it, but then just gave up, and decided I wouldn’t want to use it anyways.

I was interested in understanding how the motor was controlled. A label in the motor read:
dunkermotor
Typ: SY 52 x 60 - 2
Nr: 36124
24V 3000 U/min
There are three wires going into the motor, so it’s obviously a three-phase motor (also that’s what it says in the schematic). There didn’t seem to be any switches to turn the motor on or off in the camera itself. So it must have been the animation table that controlled the camera through the connector.
I plugged in the (working) super 16 camera into the table, and unscrewed the connector casing. The connections were (apparently) the same as in the 35 mm camera. When the camera was stopped, the multimeter accused anything from ~19 VAC to ~34 VAC between each two terminals of the motor, which seemed odd. Nothing was moving, so I just assumed it was some stray voltage with no actual power. I thought about touching it with my fingers to make sure there was no power, but then I paused for a second, thought some more, and reminded myself that a 30 VAC electrical shock can be quite annoying. With the camera running, the multimeter accused about 24.7 VAC between each two terminals of the motor. So now I knew, it was the animation table that switched the motor on and off, not the camera itself.

I didn’t feel like opening the animation table to see the circuit inside, since it seemed quite simple: at some point, the motor is switched on by just feeding it three-phase power.
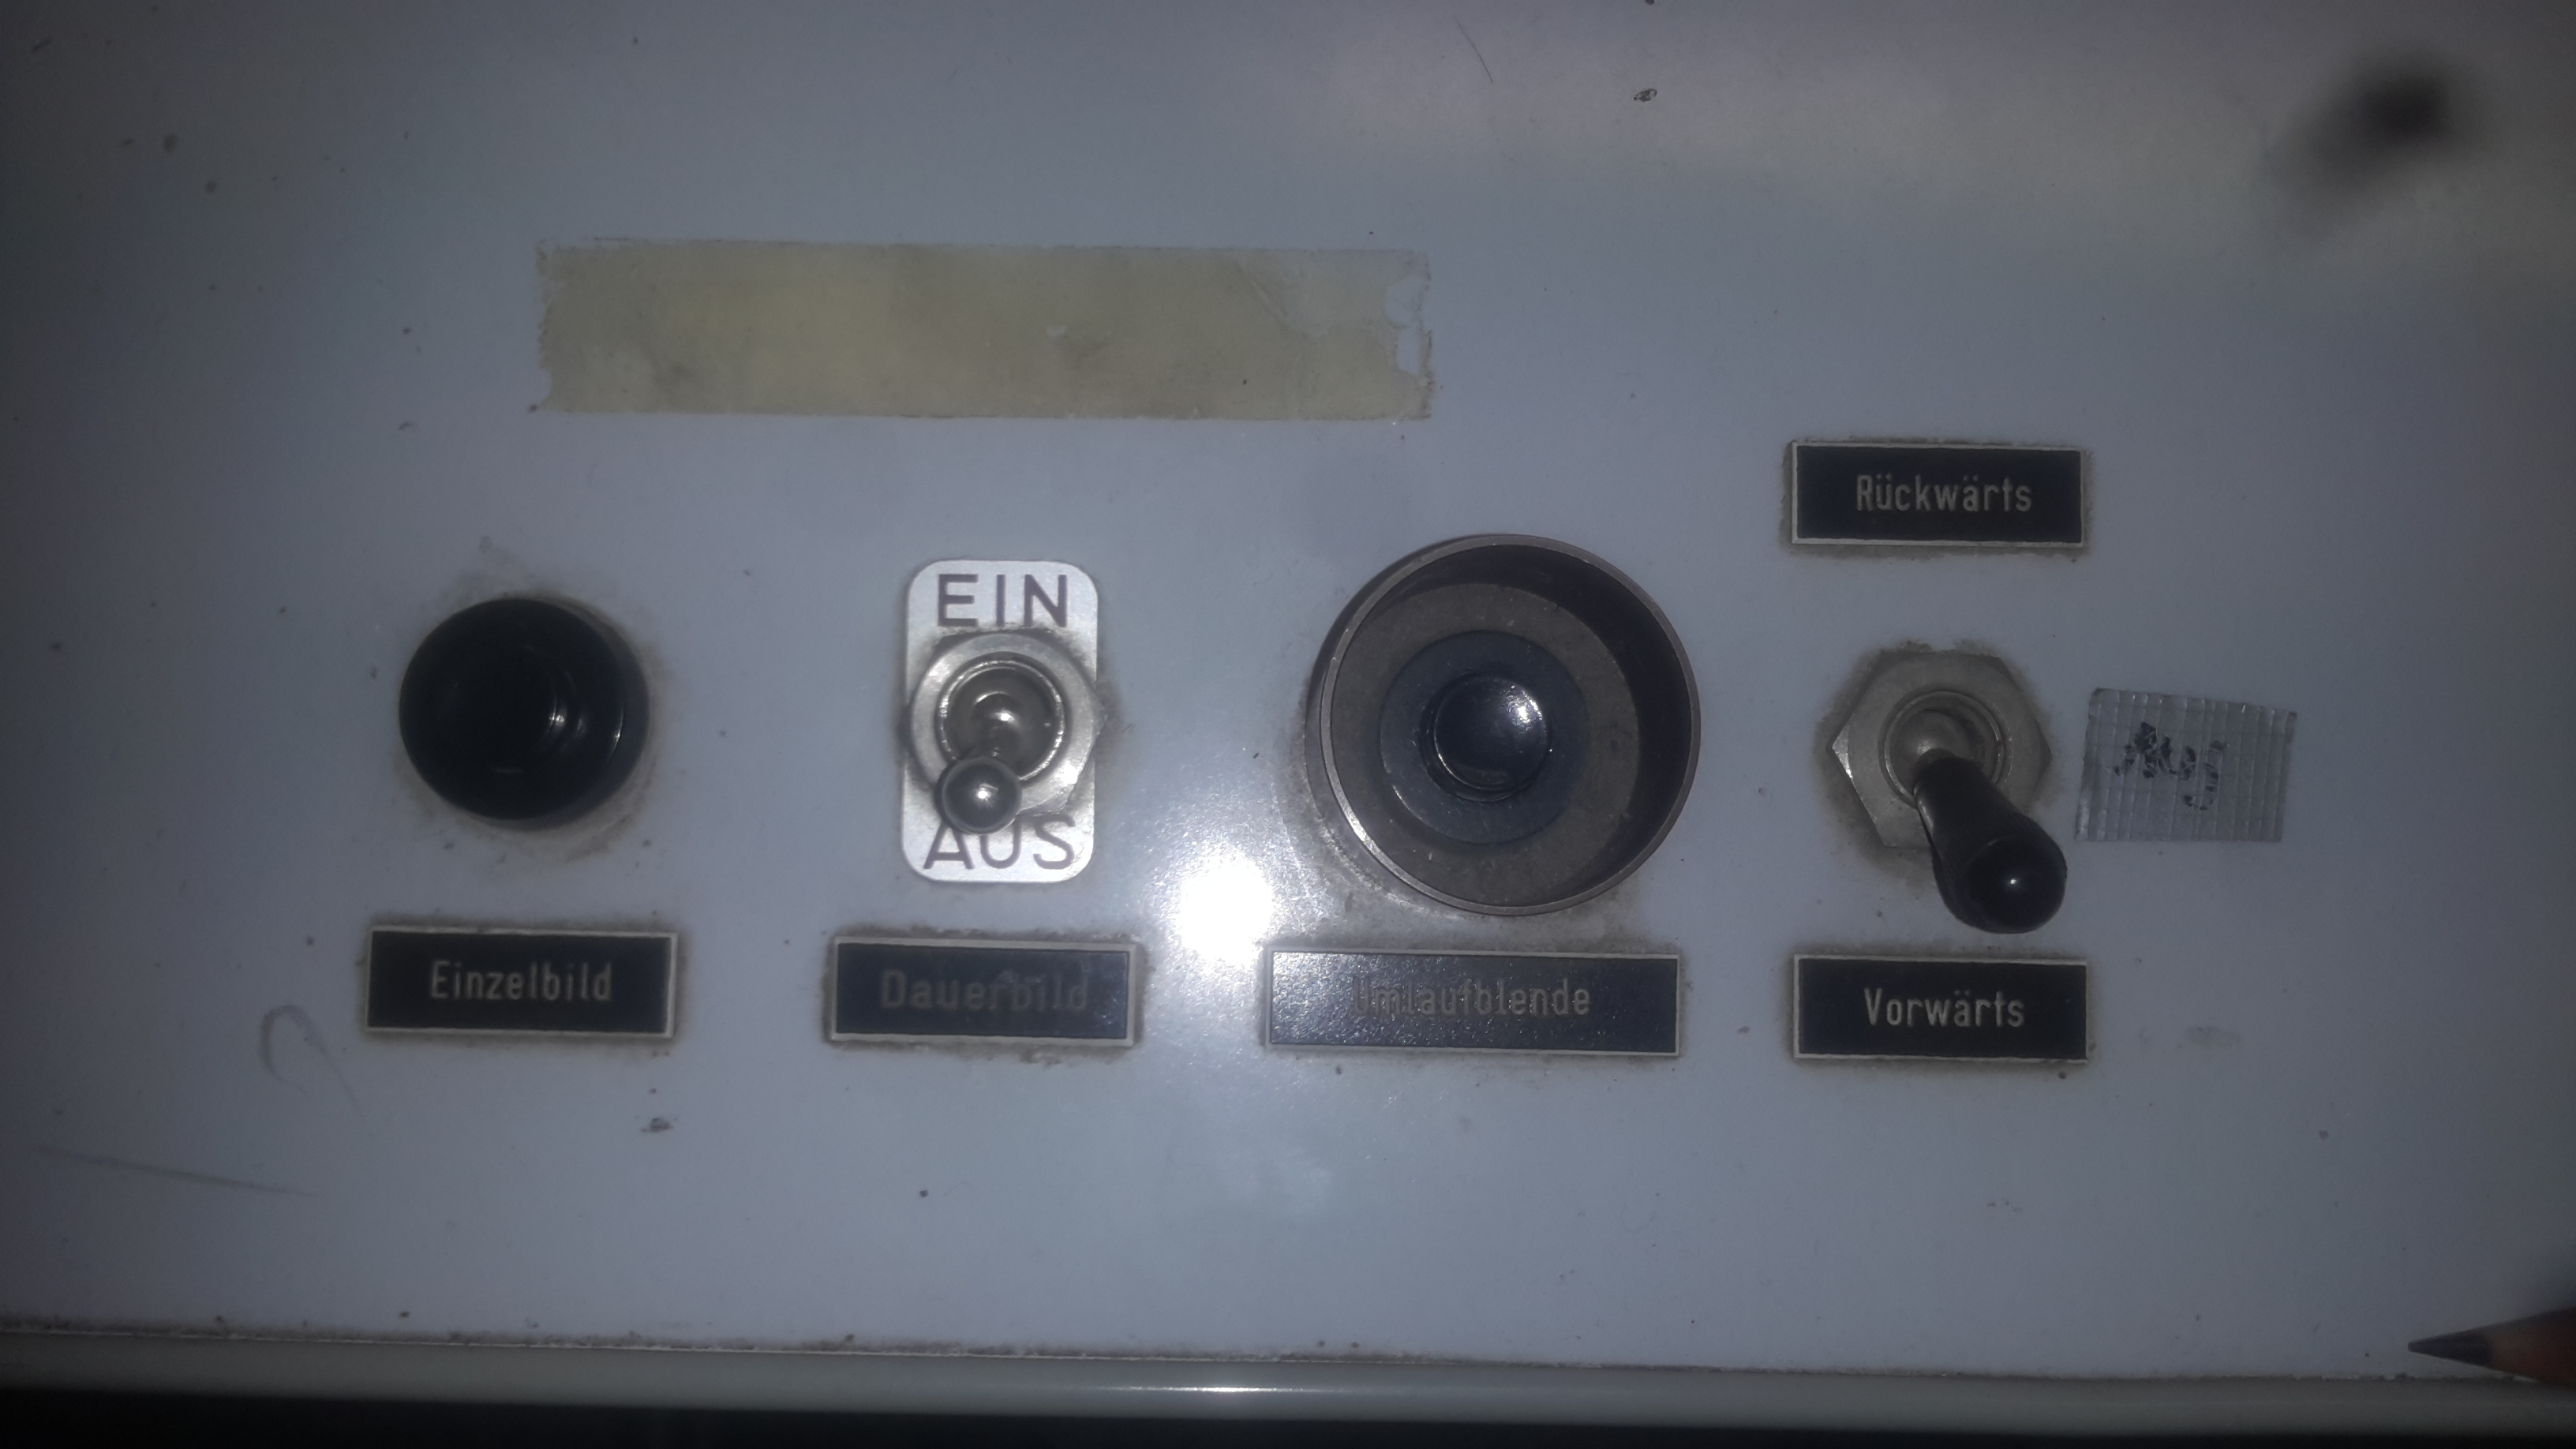
There is one knob on the animation table that reads “Rückwärts / Vorwärts”, which means “reverse / forward”. If we switch that and turn the camera on again, it magically turns the motor in the other direction. The film runs backwards, the shutter runs backwards, everything runs backwards. How does the table change the motor direction? In a three-phase motor, it’s just a matter of switching any two phases. We’ll see more about this in another post.
What does this all mean in relation to the motor and the connector? It means that turning the camera is just a matter of feeding it three-phase power directly through the connector. To test this, we decided to use the super 16 camera to jump start the 35 mm camera.

Since at first we didn’t have the right tools to do this jump start, the wires were very delicately positioned in order to just touch the connectors. At any moment a wire could slip and cause a short circuit. Luckily, that didn’t happen.
We connected a continuity tester from a multimeter to the “shutter open” switch, so that we could test that the switches were working properly. In this video you can see the result of all the hard work we did:
Now we know how the camera works. We could just build a new connector that fits into the animation table and use the 35 mm camera. But, since we know how the camera works, we can do much more! We have control over the basic operation of the camera. We know how to move the film back and forth, and we know when the shutter opens and closes. We did all that just by connecting a few wires. We don’t need the animation table to do all the work for us. We can recreate a stand-alone circuit that controls the camera in any weird way that we can think about. Long exposures, multiple exposures, sensor-activated filming, time-lapse photography…
So, what’s the next step? Replacing the animation table by an Arduino and a simple electronic circuit =).